|
  Introduction Introduction
"Legos??" "Are you kidding?" Legos are actually
flexible, durable (if built right), and quick to build with. And if your like
many parents,
you probably have possibly $100s of the stuff just laying around. Whether
you build with Legos or other raw materials, this write up will show you how to
build a custom throttle quadrant. This project will take about 3 days for
parts to arrive and about 4 hours to build.
(If imitation is the sincerest form of flattery, I own my initial inspiration
and some of the documentation from Rob Barndregt
and is write-up "How To: Make Your Own 4-Engine Throttles for FS2002" www.flightsim.com
's library as RCBth-10.zip).
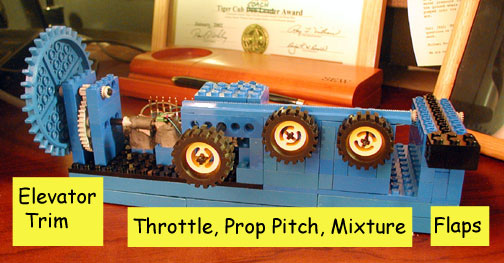
 Motivation for a Throttle Quadrant/Pedestal Motivation for a Throttle Quadrant/Pedestal
As a private pilot, I've always valued FS2002 as a real tool to help keep many
skills current. And for fun, I find the flight simulator environment is
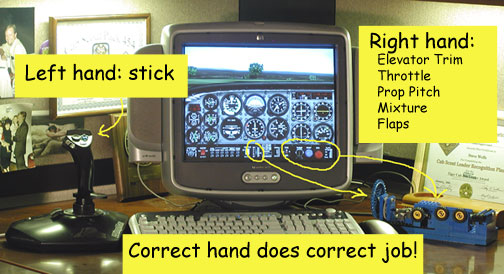
the only way I'll fly exotic and expensive big iron. One problem I never
liked about my home cockpit was that I was hampered by how my left and right
hand were doing tasks vs. the real cockpit. I was holding the stick right-handed and running most
other function left-handed which opposite to my Cessna cockpit. My goal then was to rebuild my
home cockpit so my tasks
were at least "hand correct". And thus the custom quadrant.
What is needed and how to buy:
I'm including links to all the parts require for this project. (This
delayed my first release because radioshack.com decided to get out of the parts
business.) For me
this project was about $30 total given the near unlimited supply of Legos I had
at home. If you don't have the Technics Legos (the
one with the good gears) then order this
for $17. If you are just introducing yourself to Legos, then another
$20 in starter
set is needed. The pictures are using my bucket of Legos not from this
kit, I have pictures of the same setup using the start kits at the end. If
there is a specific part of two you just can't live without, consider purchasing
specific Lego parts from here.
I do not recommend trying to purchase electronic stuff at a local store
(unless you have killer electronic stores that I just don't have access to in
Sacramento). I've included links for ordering in the US. If you live
outside North America, the links include the part numbers and manufactures and
I'd recommend finding a good general purpose electronics supply
shop.
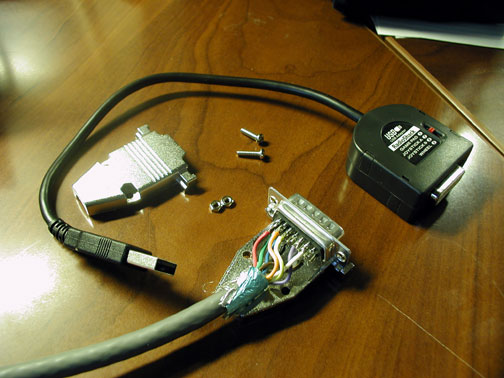
For the electronics, the readily available analog joystick to USB converter
provides both a lost cost and low risk to blowing up your computer solution for
connecting to your computer. The Radio
Shack 26-164 ($16.99) USB gameport adapter allows 4 analog ports and 4
buttons. It connects using a standard 15 pin (DB-15) male connector (here
and here)
and I used 6 ft of 10
conductor shielded wire. Mini 100KOhm
pot provide 210° rotation and mini
buttons provide easy solution for the flaps and other buttons you might
consider.
Marrying the electronics with the Legos is as simple as wire wrap (here
and here
and here)
(better than soldering in my opinion). Mounting
the potentiometers is done using inexpensive and moldable epoxy
putty. Connecting your new throttle quadrant to FS2002 is best done using FSUPIC.
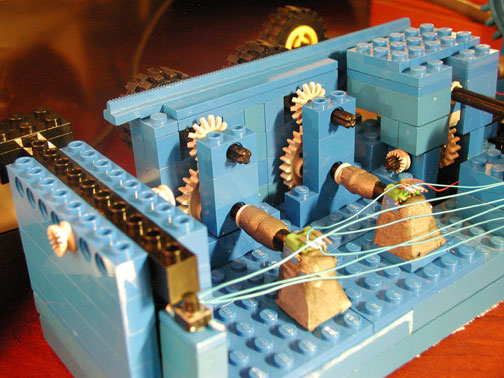
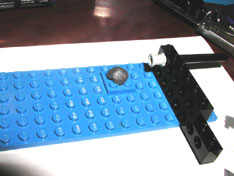
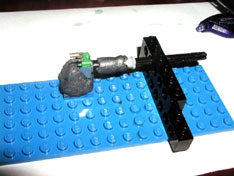
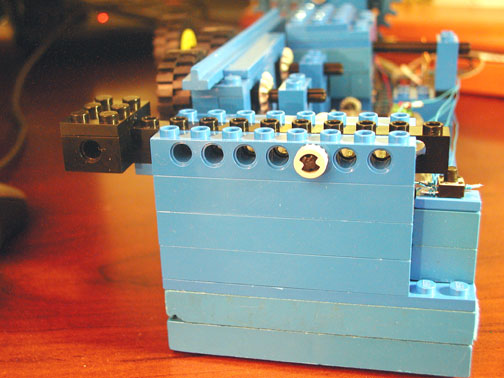
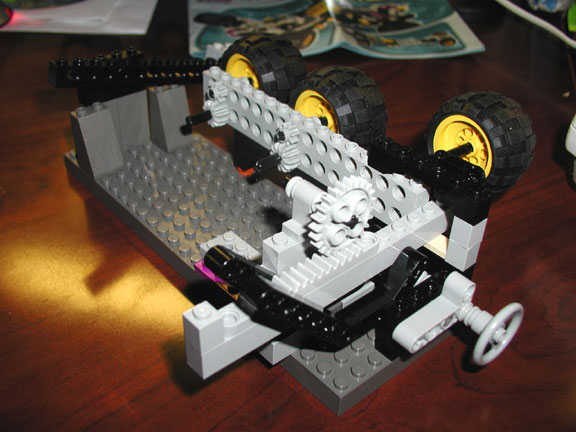
Assembly
The pictures will say most of what needs to be said about gears and what
not. Part of the fun is experimenting with various designs getting the
right look and feel vs. the real thing. Don't just rebuild what I did as
experimenting is most of the fun with Legos.
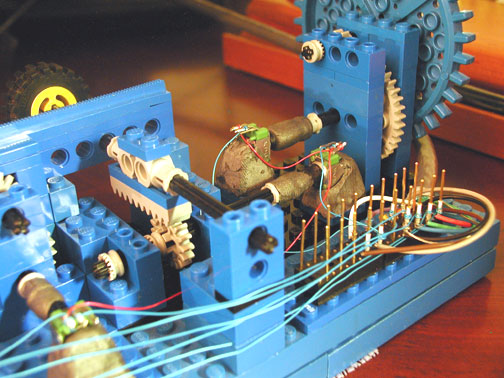
Sadly, Lego doesn't make 100K ohm potentiometers so they will need to build
your own "Lego pots". Using epoxy putty, just cut the amount you want off the
"tootsie roll" (about 3/4" per pot) and kneed it between your fingers. You have about 5
minutes before the putty turns into a very hard clay and about 1 hour before it turns
into a rock. I pre-built a jig to make all 4 pots at the same time and
then built one at a time. Keeping your fingers wet with water keeps your
fingers and everything else from being a mess. After 3-4 minutes you can take small blade and
trim the edges for style points.
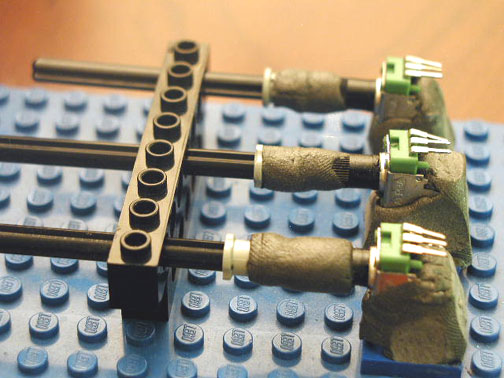
After they are built, they will work in any Lego configuration

The flaps are built with a simple push up/push down with a micro push button
switch at each end. The buttons are held in place with a small Lego 1x2
piece with a spot of super glue:
To make the flaps switch more stable and more rugged, I added a set of
support Legos which hides one of the switches..
USB or not USB
The method of converting a variable resistance to a number that FS2002 can
use is done by measuring the time it takes to charge a capacitor through the resistance (don't
worry if you didn't understand any of this paragraph, this is
just ranting of a computer architect). Although most computer have an available analog joystick port
at its disposal, I don't recommend using it. By using the PC's joystick
port, you are asking the main CPU running a multi-tasking and multi-treading
operating system to measure time without interrupts. This both consumes useless
cycles and has limited accuracy because of the other jobs the CPU is
doing. The low cost USB game port adapter uses a small dedicated processor
(I have details if interested) for this time measuring task and provides a
simple digital value to the main computer. I strongly recommend going USB
if you have an available port and an extra $17.
Wiring it all up
I'm going to borrow Rob's diagram from his excellent first article. My
only modification was to use 10 lead cable to allow routing the 4th button.

In my implementation I ran 6' of 10 conductor shielded wire and placed the
USB converter close to the USB hub. If I were to do it again, I'd place
the USB converter on the throttle quadrant and use a USB
extension cable.
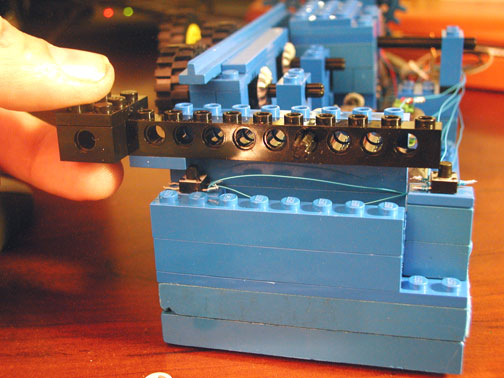
Somehow the "permanency" of soldering wire seemed counter to using Legos
allowing freedom of easy changes and updates. Thus starting from the other
end of the cable and for the remainder of the electronics I used
wire-wrapping. If you've never worked with wire-wrap before, it provides
both reliability and easy rework. I used an 32 pin upside down DIP socket
as a wire wrap mounting post area and trimmed off every other pin for more
spacing.
Since the wire wrap tool is made for 30 gauge wire and the 10 conductor is 24
gauge, I trimmed about 1/2 the strands and didn't wrap any of the insulation as
is typically done.
Finishing
Although I chose to keep my wiring exposed because I continue to tinker with
the design, there is some risk having exposed power and signal wires.
Although not a shock risk, if the power wires are shorted I really doubt the USB
converter fuses them and there is a risk that it might make your PC supply
unhappy and/or a fire hazard. And although (most) modern chips are quite good at
protecting themselves against damage from electrostatic discharge (ESD) there is
a risk that a good "zap" from your fingers might damage the USB
converter, joystick port, or worse. Thus I plan on, and recommend you
also, cover the exposed wires in either Legos or some other enclosure when your
happy with your design.
Connecting to Windows and FS2002
Rob Barndregt's article does a good job describing the task of connecting
your joystick to windows and fs2002 through FSPUIC and doesn't need to be
repeated here. See Rob Barndregt
write-up "How To: Make Your Own 4-Engine Throttles for FS2002" www.flightsim.com
's library as RCBth-10.zip).
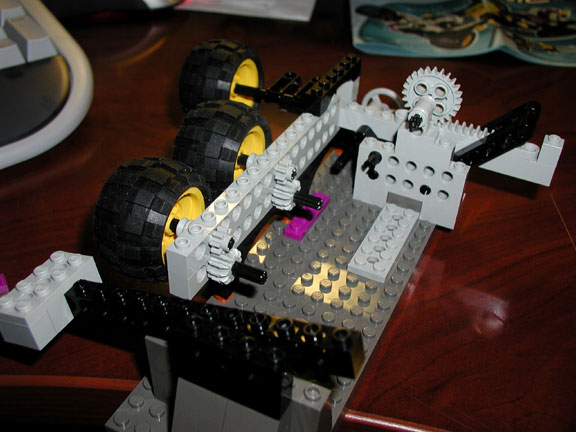
So what if you don't have a zillion Legos around the house?
Below is a throttle quadrant I built using the two starter sets I
recommended. I'd consider doing a better wheel for trim and add some lead
weights to hold it down, otherwise, I think it looks great.
Parts Lists
Final Words
Please accept the standard disclaimers about the fact that I make no warrantee
about whether this will work for you and/or not put yourself and/or your
computer at risk. Your on your own! However by using a USB gameport
adapter, most risk of hurting your machine is removed.
Please feel free to email me with ideas, suggestions, questions, etc.
I'd love to see pictures of various implementations and I'll include them in a
future revision.

---Steve, Northern California
E-mail: StevenWells@RFADesign.com
Revised: 01/11/2003
May 3 2002 - First rev
June 1 2002 - Revised list of suppliers |
